#Articles
You may have seen beautiful curtains of light shining through the clouds or sparkling, radiating light in photographs. These are phenomena known as “rays of light” and “starbursts”, respectively, and are elements that give a photograph a dramatic impression. In this article, we will explain why these phenomena occur and provide tips for intentionally capturing them in photographs.
What is a beam of light?
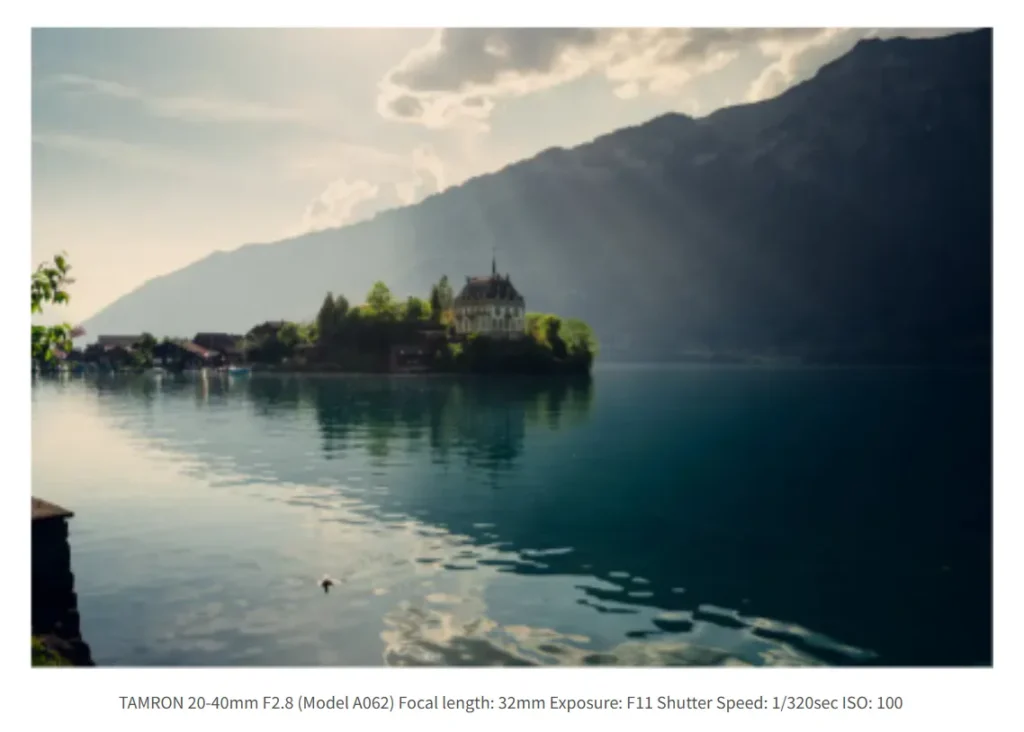
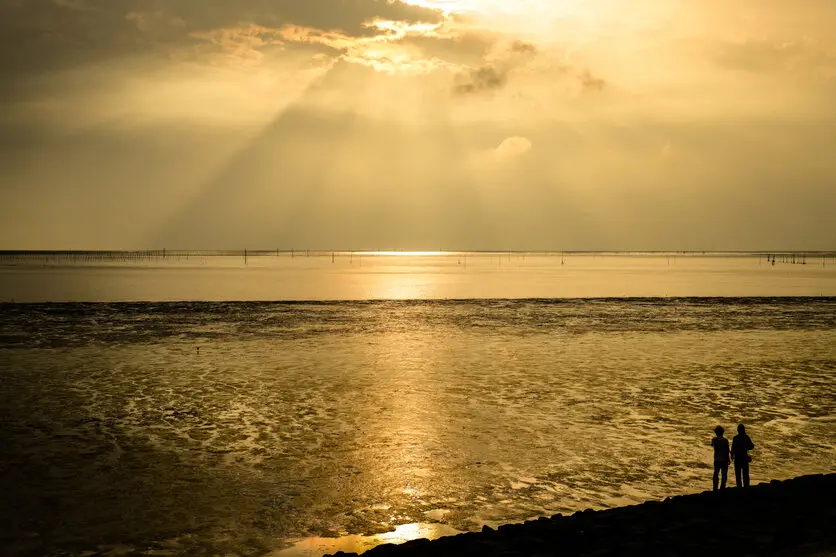
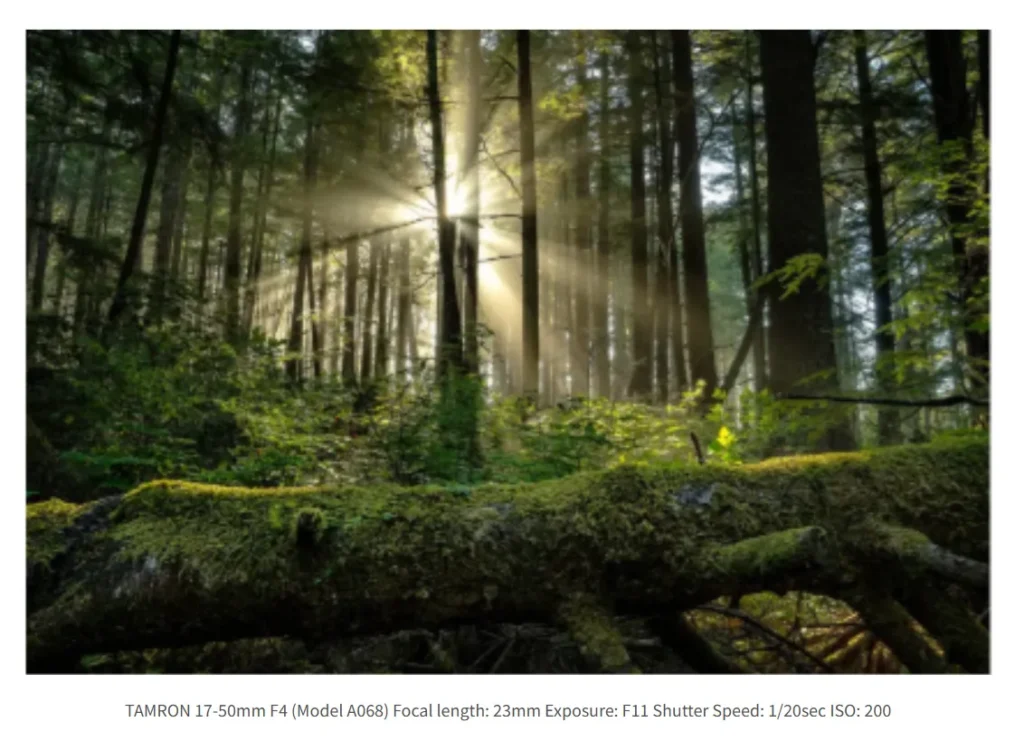
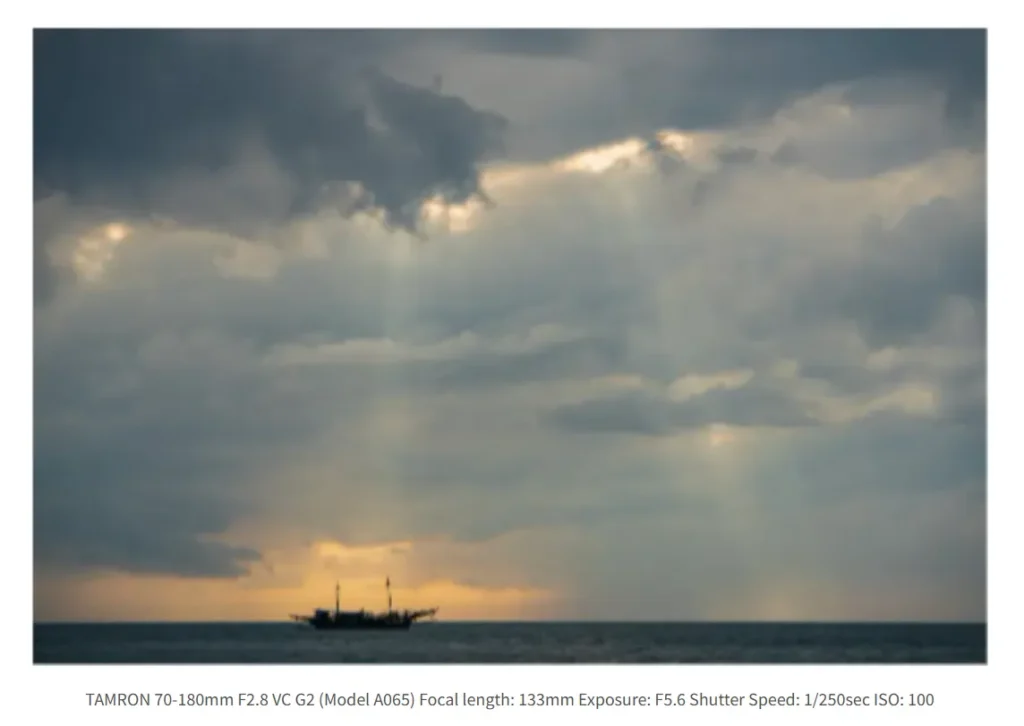
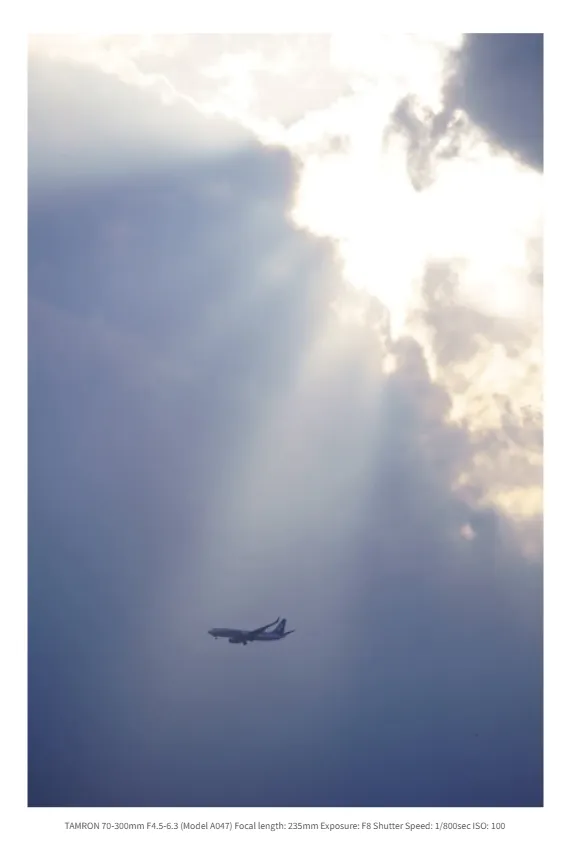
The rays of light are especially visible in strong sunlight or backlit conditions. They appear as soft, misty bands of light, sometimes resembling smoke or haze. This phenomenon creates the impression of a curtain of light pouring down from the sky. It is particularly beautiful in natural settings, such as the morning sun shining through a forest or the evening sun in a mountainous landscape. These rays, also known as crepuscular rays, bring a mysterious and almost magical atmosphere to landscape photography.
How the rays of light appear
Rays of light occur when sunlight is scattered by clouds, moisture, or particles in the air. They are most often seen in the early morning or late afternoon, when slanting light passes through mist or water vapor, forming distinct pillars of light. This effect can add drama and depth to your photographs.
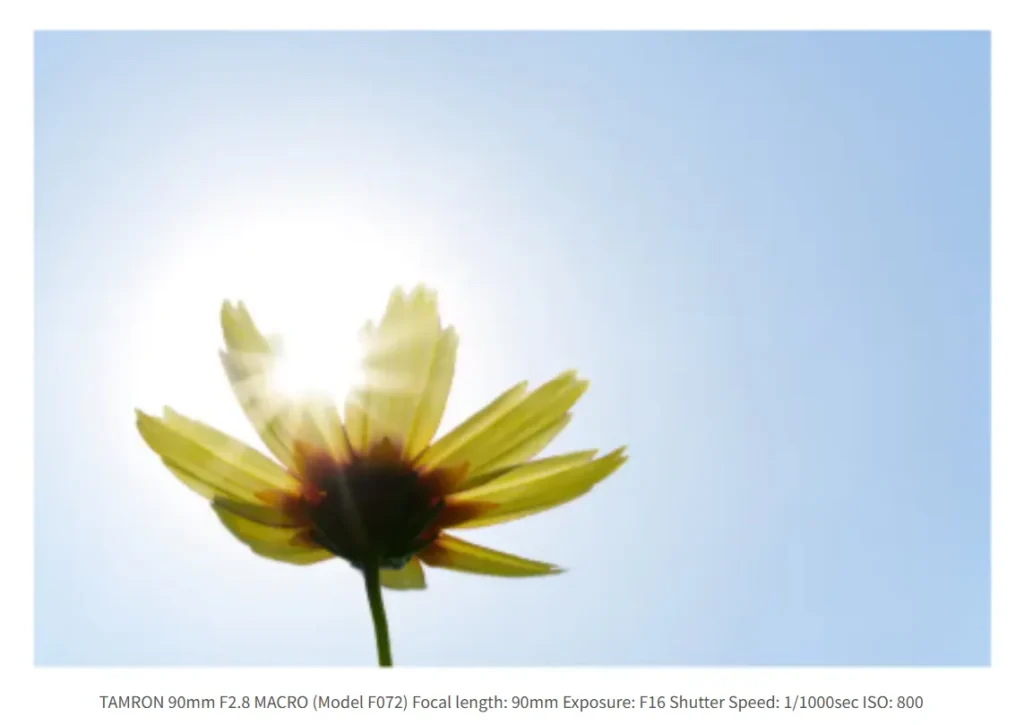
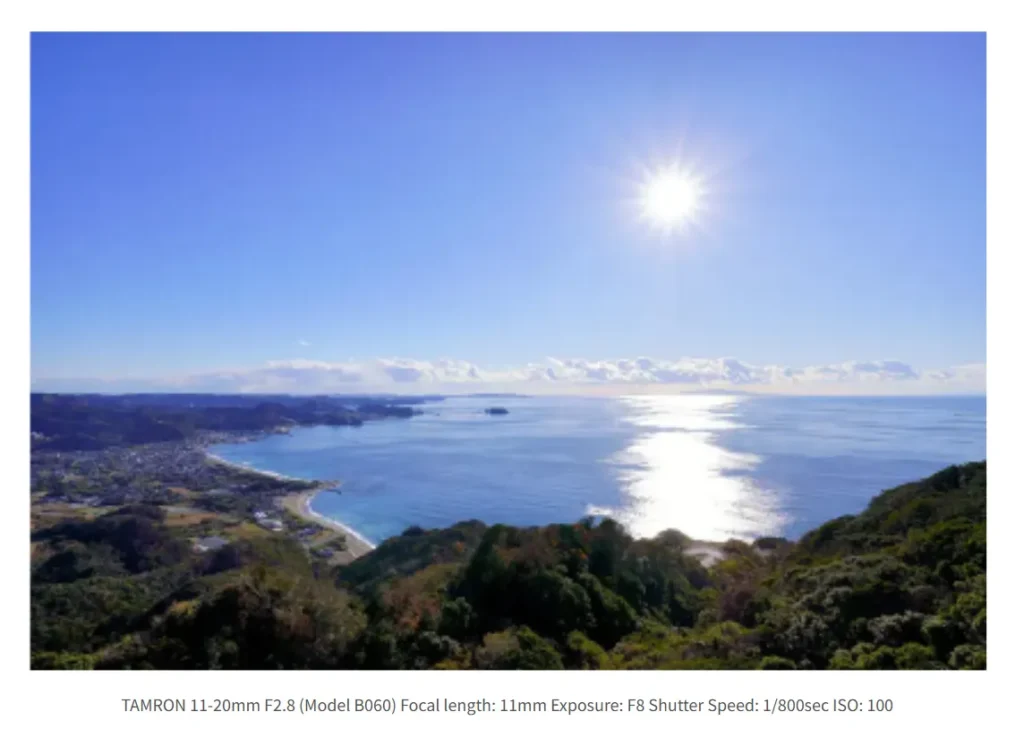
What are starbursts?
Equipment suitable for photographing rays and starbursts
Here are the key points to consider when selecting equipment to capture beautiful rays of light and starburst effects.
Camera body
A camera with a wide dynamic range can record tones across both bright and dark areas more effectively. Because light rays often create high-contrast scenes, a camera that minimizes blown highlights and crushed shadows is ideal. For night scenes, a body with excellent high-ISO performance reduces noise, allowing you to capture clear and sharp starbursts. Image stabilization is also useful, letting you shoot handheld at twilight or in the early morning without easily missing photo opportunities.
Lens
Your choice of lens depends on the subject. When photographing rays of light shining through clouds, conditions can change quickly, so a zoom lens is recommended. Try capturing landscapes with a wide-angle or standard zoom. Since these scenes are often backlit, using a lens that suppresses flare and ghosting will help render light more clearly.
For starbursts, the effect is produced by stopping down the aperture. They are often used as highlights in night photography. The shape and number of aperture blades influence how sharp or soft the rays appear. With lenses that use circular diaphragms, starbursts still become visible when you narrow the aperture.
Tripods and filters
When shooting in unstable locations or at night, a tripod is essential. Photographing light beams sometimes requires slow shutter speeds, and a tripod helps prevent camera shake. ND (neutral density) filters allow you to adjust exposure, while PL (polarizing) filters can also be effective. However, be cautious with polarizers, as an overly strong effect may weaken the appearance of the light beams.
Tips for photographing rays of light
Here are some practical tips for capturing beautiful photos of rays of light. Because this phenomenon is greatly influenced by the time of day and weather conditions, careful planning is essential. Check the best photo spots in advance and aim to shoot at favorable times to maximize your chances.
Pay attention to the time of day and weather conditions
Choosing the right timing and weather is especially important when photographing rays. Early morning and evening, when the sun is low in the sky, are the best times to capture dramatic beams of light. Foggy or misty days are also excellent opportunities, as moisture in the air makes the rays appear more three-dimensional. Fog often forms in the morning when there is a large temperature difference from the previous day, so keep an eye on the forecast and check both humidity and temperature variations.
Research the shooting location
To avoid missing the moment, it is essential to research your location beforehand. By predicting the sun’s position and the direction of incoming light, you can decide on the best spot and shoot efficiently within the limited time available. It’s a good idea to prepare several candidate locations, anticipating where light beams are likely to appear based on the terrain and tree arrangement. Preparing multiple plans in advance also allows you to adapt flexibly to changing weather conditions on the day of the shoot.
Exposure Settings
Below are some useful tips on exposure when capturing rays of light.
F-number (aperture value)
Setting the aperture between f/6 and f/11 provides a good balance between rendering the softness of the light rays and keeping the surrounding landscape sharp. Be careful not to close the aperture too much, as it may weaken the visibility of the rays.
Shutter Speed
Using a slower shutter speed will make your images brighter and can help when photographing in low light, such as at dawn or dusk. In forest scenes with rivers, a slow shutter speed can also blur water flow into a soft, silky texture that complements the beams of light. However, longer exposures increase the risk of camera shake, so be sure to use a tripod when necessary.
ISO Sensitivity
In most situations, auto ISO works well. As a guideline, ISO 100–200 is suitable for sunny days, while ISO 400–800 is better for cloudy days or twilight. Since image quality is especially important when photographing light beams, use the lowest ISO setting possible to reduce noise.
Exposure Compensation
Bright elements such as white sand or sea spray can cause overexposure. In such cases, adjust exposure compensation to the negative side. On the other hand, if the scene is strongly backlit or shadows appear too dark, increase the compensation. Striking the right balance between highlights and shadows often requires trial and error, so review your images and fine-tune accordingly.
White Balance
Start by shooting with auto white balance, then adjust as needed to achieve your desired look. White balance is an effective creative tool: you can emphasize warmth with golden tones or create a cooler mood with blue tones. When shooting sunlight in the evening, adjusting to capture its warm glow will make your photos feel more impressive and emotionally engaging.
Composition that makes the most of the impression of rays of light
When photographing light in backlit scenes, placing the light source or beams in the center or upper third of the frame creates a striking composition. Because the appearance of light beams changes constantly with the time of day, knowing the basics of composition—such as the rule of thirds and diagonal composition—will allow you to adapt flexibly to different conditions.
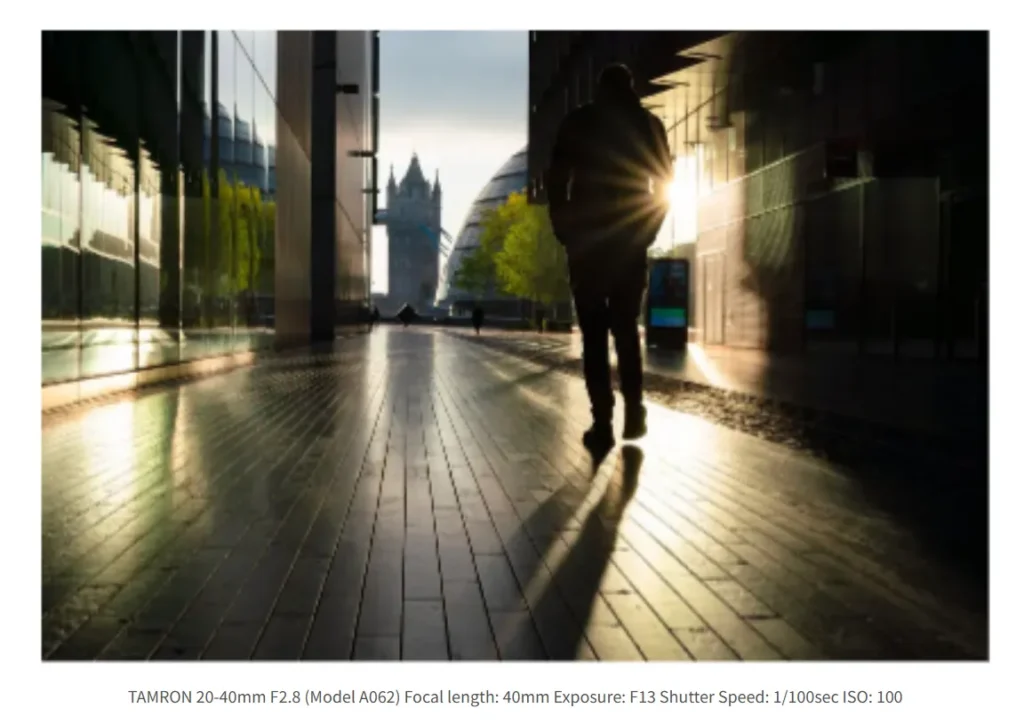
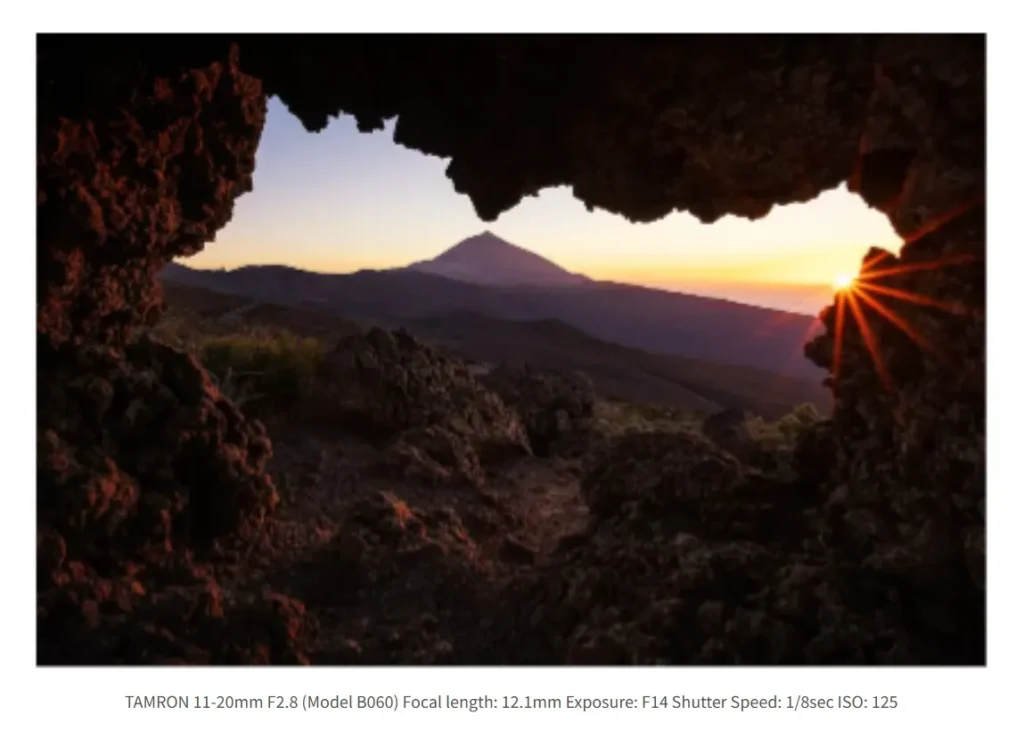
When shooting the sun directly, you may be able to capture both rays and starbursts at the same time, achieving a more complex and beautiful expression of light. Adding silhouettes of mountains or trees in the foreground enhances the presence of the rays and makes them stand out more vividly.
Adjust the overall impression with retouching
A more natural finish can be achieved by lowering overly bright areas and reducing blown-out highlights around the beams of light. Raising the shadows moderately will bring out more detail in darker areas. Fine-tuning saturation to balance the warm colors of a sunset with the brightness of the rays will result in a more impressive image. However, be careful not to over-adjust, as excessive editing can make the photo look unnatural.
Tips for photographing starbursts
Here are some tips for creating starbursts and taking photos that match your image. By using strong light sources such as street lights in a night scene or sunlight and adjusting the aperture and exposure settings, you can create a dramatic accent.
Narrowing the aperture
To create starbursts, try narrowing the aperture to around f/8 to f/16. This makes the rays around the point light source more distinct. However, stopping down too far, such as to f/22, can cause diffraction, resulting in an overall loss of sharpness—so avoid closing the aperture excessively.
Exposure settings other than F-number
In addition to the F-number, be sure to check other settings for controlling exposure, such as shutter speed and ISO sensitivity.
Shutter Speed
When photographing starbursts, set the shutter speed fast enough to avoid camera shake. Use a tripod if necessary. Since night scenes often require shutter speeds of 1/60 second or slower, having a tripod on hand is highly recommended.
ISO Sensitivity
For daytime starbursts, ISO 100–400 is recommended, while for night scenes ISO 800–3200 is appropriate. Be careful not to set ISO too high, as this may increase noise in the image.
Exposure Compensation
As with rays of light, starburst photos often involve backlighting, which can make the subject appear too dark. Apply positive exposure compensation to brighten the subject. Conversely, if the light source is too strong and washes out the image, use negative compensation to restore balance.
White Balance
Start by shooting with auto white balance, then adjust to achieve your preferred color tone. If you want to emphasize warmth, select the “Daylight” setting for a golden, warm look. For cooler night scenes, using the “Incandescent” setting enhances blue tones, adding atmosphere to city nightscapes.
Composition that makes the most of the impression of rays
When photographing a starburst from a single light source such as the sun, positioning it one-third from the top or slightly off-center, and letting the rays extend diagonally or radially, creates a crisp and dramatic impression.
If multiple light sources such as street lamps are included in the frame, consider the perspective. By composing with depth in mind, you can dynamically express both order and visual impact.
Shooting methods for different scenes
Photographing rays of light and starbursts requires different approaches depending on the situation. Let’s look at some practical tips for various scenarios, such as when using sunlight as the main source, capturing city nightscapes, or photographing wide landscapes.
Creating rays from sunlight
Instead of capturing the rays as the main subject, try using them as an accent to highlight your subject. For example, you can create a dramatic effect by shooting against the light and turning the subject into a silhouette, contrasting it with the beams of light. For more serious photography, a PL (polarizing) filter can be effective for reducing reflections and adjusting contrast with the rays. However, since PL filters can sometimes weaken the visibility of the rays, it’s important to use them selectively depending on the conditions.
Use light rays to accentuate the night view
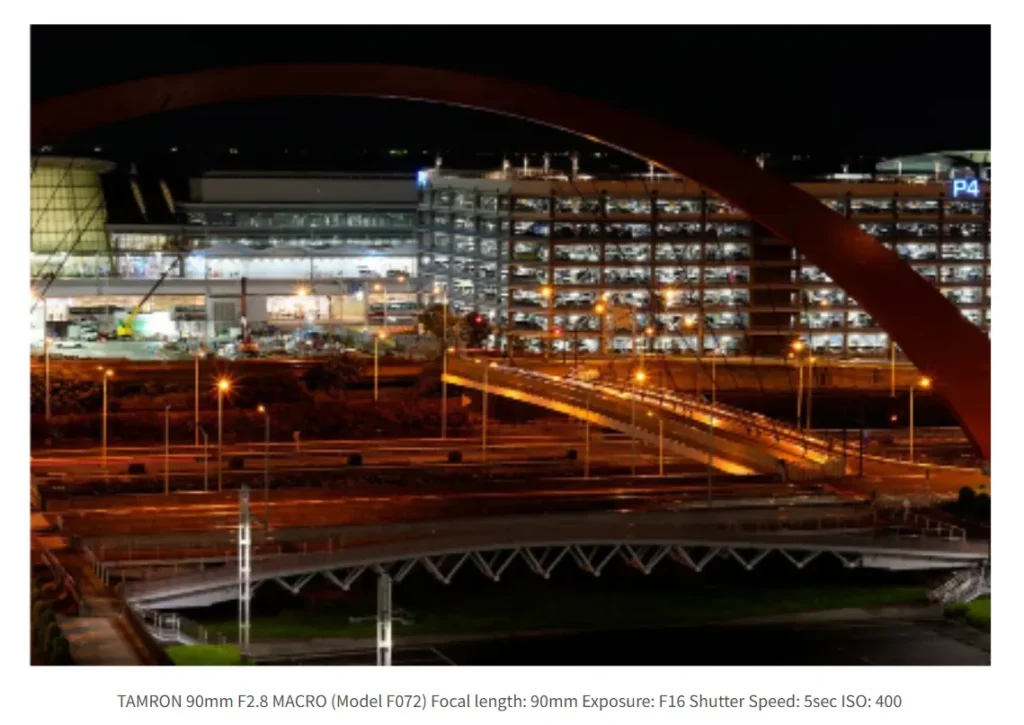
By using street lamps or building lights as light sources and narrowing the aperture to around f/11 to f/16, you can create striking starbursts. With evenly spaced streetlights, a diagonal composition emphasizes perspective and creates a sense of depth. If light sources are scattered across the frame, applying the rule of thirds makes it easier to achieve visual balance. Set the ISO between 1600 and 3200 to capture details in the night sky while maintaining harmony with the rays of light.
Create a mysterious landscape with rays of light
In conditions of morning mist or mountain fog, rays of light appear clearer and more three-dimensional, producing a magical, atmospheric scene. You can capture stunning rays by shooting early in the morning in a humid environment, such as on a sunny day after rainfall or near water. A classic example is light filtering through trees in a forest. Look for spots where the trees are not too dense and sunlight can pass through. A vertical composition works well here, as it highlights the column-like shape of the rays and enhances the gradation of the scenery.
Beautiful rays of light as an accent in your photography
Light beams are a phenomenon where light is scattered by fog, water vapor, and trees, so it’s important to aim for suitable weather conditions in the early morning or evening. This will allow you to capture fantastical landscape photos. On the other hand, starbursts are a phenomenon caused by diffraction due to the camera’s aperture, and beautiful starbursts can be created by narrowing the aperture to around F8 to F16. They are an accent that emphasizes the beauty of night views. Try taking some photos and put the tips in this article into practice.